
How to Wax Skis & Snowboards at Home
Waxing your skis or snowboard is kind of like riding powder – it’s impossible to do it too much. Waxing on a regular basis not only makes you go faster, it makes turning and handling smoother and more predictable and protects your bases from abrasion. With a little practice, you can master the art of waxing and consistently outrun your partners on the flats or that high traverse to get to the goods. Interested?
First things first, there are different types of waxes for different activities. For example, a downhill racer will use a different kind of wax than a cross country skier. The primary type of downhill ski wax comes in hard blocks that are melted on to the ski with an iron. There are a few other types of waxes, too, like pastes and liquids. These are made more for last-minute on-hill touchups - there’s no substitute for a good hot wax. In this guide, we’ll focus on traditional hot waxing.
Preparing Your Workspace & Equipment Needed
If your skis have brakes, retract them before you start working on your skis by pulling them up manually and running a strong rubber band around the brake arms and over the heel piece. This will hold the brakes in “ski” position so they don’t extend below the base. Waxing is easiest with a proper vise that keeps the skis or board level, locks them into place, and supports the tips and tails, but it can also be done with blocks of wood supporting the tips and tails. This keeps the bindings above the work surface and keeps them from rocking around in all directions. It’s very difficult not to drip some wax off the skis, so if the surface below you needs protection, cover it before you start.

Ski & Snowboard Waxing Equipment List:
●Work bench, vices, or waxing platform
●Rubber bands to hold ski brakes up
●Wax
●Waxing iron
●Plastic Wax Scraper
●Waxing Brushes
Preparing Your Skis or Snowboard for Waxing
Starting with a clean and properly structured base will help you get the most out of each waxing session. Make sure the base is flat and the edges are not railed (higher than the base). You can use something like a ruler or a dedicated truing bar to check this. If your bases are not flat, you need a stone grind to correct them. If your edges or bases need a grind or other maintenance, do that before you start to wax, and make sure no metal filings are stuck in the base. If you have burrs or knicks in your edges they can scrape the base of your iron, which can scratch your bases.
If your bases are dirty, you can use base cleaner or a solvent to remove grime and oil, but use it sparingly and be sure to allow the bases to dry completely before waxing. If you use a solvent, just a small splash on a cloth is plenty. Be careful, base cleaners and solvents tend to remove all residual wax left in your base, which can leave them dry. So, skip this step if your bases seem clean.
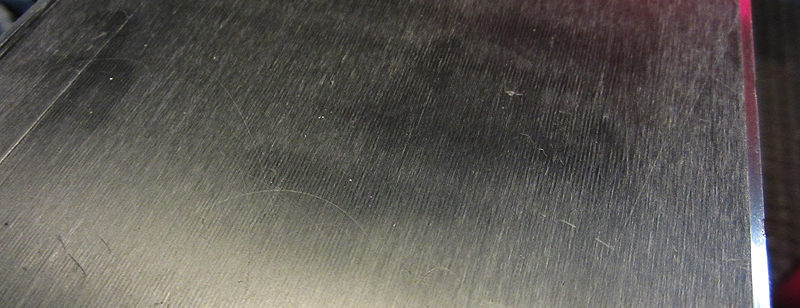
dry ski snowboard base
A dry base with visible white areas or obvious “hairs” showing in the P-Tex are sure signs that you need to wax NOW. This base needs wax badly!
What ski or Snowboard Wax Should I use?
There are a huge range of waxes available, made for all different types of snow conditions. At a basic level, ski & snowboard wax is either “all-temperature” or temperature specific.
All-Temperature Ski & Snowboard Wax
All-temp or universal wax is designed to work well in any temperature or snow conditions. It may be a good choice if the temperature varies a lot where you ride, if you don’t wax your skis that often, or if you ski in different geographical areas during your season and can’t predict what the weather will be like.
Temperature Specific Ski & Snowboard Waxes
Snow is all the same temperature, right? Not so fast, snow temperatures can vary with moisture levels, air temperature, and other factors. Temperature-specific waxes are designed to work best within a certain range of snow temperatures, providing increased performance.
Swix “8 Series” (pink) waxes, for instance, are meant for snow temperatures between 1˚C and -4˚C (34˚F to 25˚F). There is some overlap in the temperature ranges; the next colder wax, the “7 Series” (violet), is for temperatures from -2˚C to -8˚C (28˚F to 18˚F). Temperature specific waxes will still work better than no wax in temperatures outside of their “ideal” range, and it’s possible to combine two temperature specific waxes if you anticipate borderline temperatures. Using temperature specific waxes requires that you follow the weather and anticipate the temperatures you’ll be riding in, and you might find yourself re-waxing if conditions change drastically. If you’re on the fence about which temperature-specific wax to use, opt for the colder range. Colder temp waxes do better in warmer snow than the opposite.
Fluorocarbon Ski & Snowboard Waxes
Traditionally, ski & snowboard waxes are available in Hydrocarbon (basic), Low-Fluorocarbon (faster), and High-Fluorocarbon (fastest) versions. The increase in glide from adding fluorocarbons to wax can be dramatic, especially in high water content snow, but the price increases are pretty significant, too – users of high-fluoro waxes tend to be competition-oriented and willing to pay to gain a slight advantage in speed. For most recreational use, hydrocarbon or low-fluoro waxes are a good choice.
Airborne fluorocarbon fumes and particles have been associated with certain health risks, and PFC’s (perfluorochemicals, the type of compounds associated with ski waxes) have been shown to accumulate in your body over time. If you use these waxes, it’s recommended that you do so in an area with good ventilation and consider the use of a mask or respirator if you work with them a lot.
Green & Environmentally Friendly Ski & Snowboard Waxes
Some ingredients found in traditional ski and snowboard waxes, like fluorocarbons, have been found to have negative environmental impacts. In response, some companies have created more environmentally friendly products. They claim that these work just as well as their traditional counterparts.
What Kind of Iron Should I Use to Wax my Skis or Snowboard?
Sure, you can use any iron to melt wax onto a ski, it’s a pretty simple process after all, but that doesn’t mean you want to reach straight into your closet for your clothes iron. A dedicated wax iron is a good investment if you plan on waxing your own skis or snowboards regularly; they are calibrated in degrees rather than fabric types, and hold a specific wax temperature more accurately.
ski & snowboard waxing iron

Can You Use a Clothes Iron to Wax Skis & Snowboards?
Yes, you can use a traditional clothes iron to wax skis or a snowboard, but there are some things to be aware of. First, don’t plan on using the iron on your clothes again - you’ll almost certainly ruin them with wax. Also, look for a clothes iron without steam holes (wax can get trapped in these), and a thick baseplate - this means more consistent temperatures.
Regular household irons fluctuate in temperature more widely than wax-specific irons and can easily be set at too hot a temperature, causing you to damage your bases. Be careful not to overheat the wax - find a temperature that melts the wax easily but doesn't smoke when the wax contacts the iron. This is usually somewhere around the lower end of the "wool" setting or the high end of the "synthetics" setting. Anything in the cotton or linen zone will be too hot. Using a wax specific iron, which has a lower maximum temperature, will make it easier to avoid damaging your base.
How to Wax Skis & Snowboards
1.Secure the skis or snowboard to your bench. Place your skis or board flat and base side up and securely supported at the tips and tails They should be clamped or braced so they won’t move while you work on them. Pull up the ski brakes and use a thick rubber band stretched between the brake arms and over the heel piece to keep them out of the way.
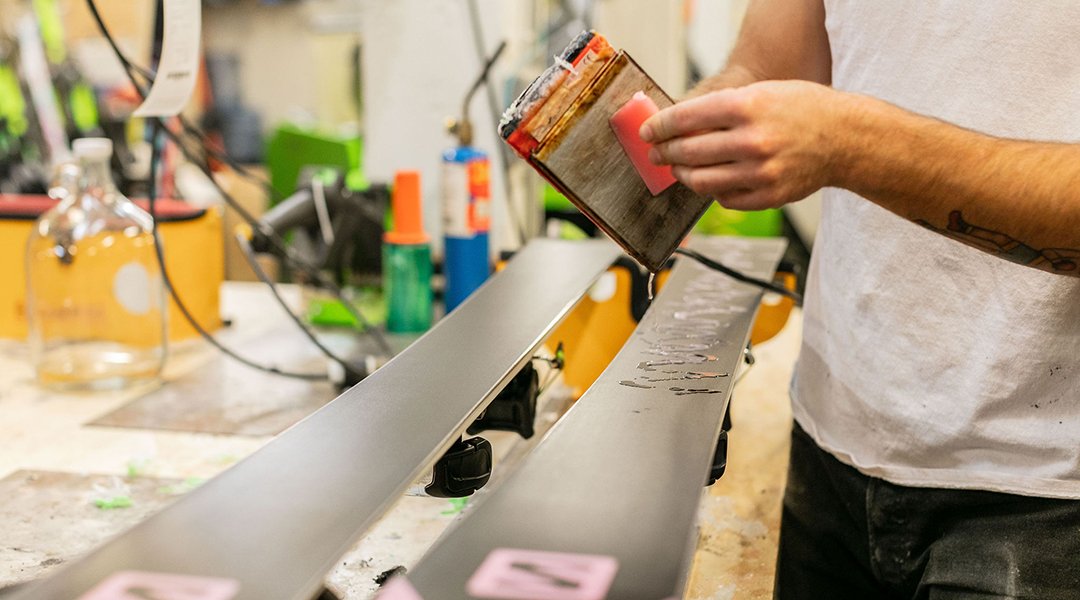
2.Begin dripping wax onto the skis or snowboard. Hold the hot iron upright with the point or one corner facing down. Press the wax to the iron, moving it around on the hot surface. This will start melting the wax, dripping a small stream onto the ski or snowboard. You don’t need full coverage here, you’ll spread the wax over the entire base in the next step.
3.Use the iron to spread the wax over the entire ski or snowboard. Put the iron to the ski base and move it down the ski to melt the wax you’ve deposited on the base. The goal here is to spread the wax out evenly so it penetrates the entire base. Keep the iron moving at all times; usually a speed of about 1 - 2 inches per second will prevent damage to the base by overheating. Too hot to touch with your hand is too hot!
4.Let the wax cool completely. It’s best to leave your skis or snowboard at room temperature until the bases feel completely cool to the touch, usually about 30 minutes. If in doubt, wait a little longer.
5.Once cool, you can move on to scraping and brushing the skis or snowboard.
Scraping Skis & Snowboards
A common misconception is that wax needs to be thick to be effective. Actually the opposite is the case; the best wax job is visible only as an oily sheen on the P-Tex, and little or no wax should come off if you scrape the base with a fingernail. As many pro tuners say, the wax should be “in the base” not “on it.”
To get the wax layer that thin, you need to scrape off the excess. Ski & snowboard wax scrapers are made from polycarbonate (plastic) and steel. You should almost always use a plastic scraper, steel can remove base material and damage your bases. A sharp scraper is your best friend. You can buy a dedicated scraper sharpener, or run the flat edge over sandpaper, using a guide to make sure it stays straight.
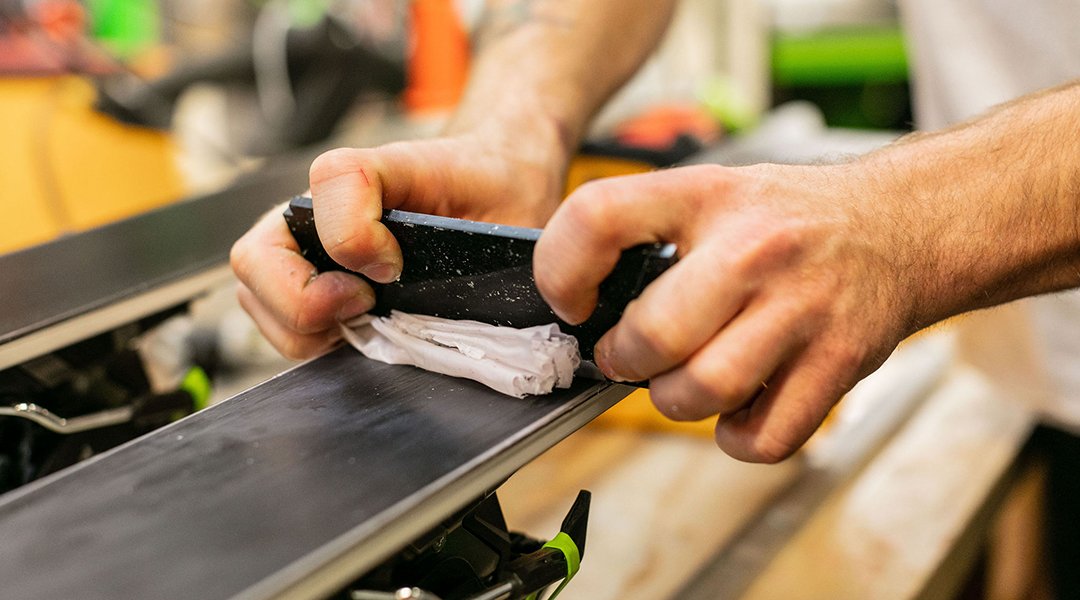
scraping ski wax
Angle the scraper in the direction of travel and push from tip to tail to remove the wax. With all work on ski bases, you should always work from tip to tail. Under-scraping is probably one of the most common errors that beginner tuners make - you should scrape until no more wax is coming off of the base. Remember to scrape your edges as well with the end of the scraper.
Brushing Ski & Snowboard Bases
After you’ve scraped thoroughly, the next step is brushing. This is a step that many skiers and snowboarders skip, however, it does pay off in speed and performance on the mountain. There are many types of brushes that vary by the stiffness of the bristles. A typical quiver of wax brushes usually includes a brass brush (for base structuring and prep), a stiff nylon brush, a softer nylon brush with shorter, finer bristles, and a very fine horsehair brush. When brushing, start stiffer and progress to finer, softer brushes as you work. The idea is to leave only the thinnest layer of wax on the surface of the base and allow the structure (the fine texture of grooves and divots) of the base to show through.

Brush from tip to tail in short to medium strokes, about 6” at a time, and keep at it until the base is uniformly oily and glossy looking. As you work you’ll notice tiny white flecks of wax being deposited at the end of each stroke, even when it appears all the surface wax is gone – that’s the wax being pulled out of the structure to make you fast-fast-fast. You’ll notice less and less wax coming out of the base as you brush more. It’s pretty hard to over-brush, but keep at it for five to ten minutes or so or until you get tired. Finish off with several full-length tip-to-tail strokes, and you’re ready to ride.